In my last post, I mentioned that I had transitioned to a new productivity platform for time management and organization. That platform is called ClickUp. In this post, I want to explain my ClickUp system, and some tips and tricks I’ve learned along the way. I’ve been using ClickUp for a few months now, and I find it the perfect supplement to my bullet journal for keeping track of routines, work projects, and time spent on each.
Note: this is not a sponsored post; I just really like this platform! I also do use a paid version rather than the free version, because I wanted a bit more automation than the free version allowed. It’s definitely been worth it, in my opinion.
Why I Switched To Using ClickUp
You might remember that the first digital productivity tool I used was Trello. I liked it for keeping track of checklists (and other lists), as well as the visual layout of the kanban-style boards.
But Trello was limiting in what I really needed it to do. With the free version, I had to manually create new lists from templates instead of that process being automated. And there was always something that wouldn’t quite work the way I wished it would.
Eventually, I decided to branch out and explore some other options. I played around with a few different apps, but once I landed on ClickUp, I haven’t looked back.
My Guide To Using ClickUp
At first, using ClickUp was very intimidating. It has a pretty steep learning curve, and can feel very overwhelming. There’s so much that you can customize! But once I figured out the system that works for me, it made such a difference in staying organized and focused.
Tip: I also found tutorials from channels like this one to be extremely helpful in getting set up and in learning about some of the tricks I now use on a near-daily basis.
If you’re new to ClickUp, here’s a very quick overview of how it works:
- The basic organizational hierarchy consists of Spaces -> Folders -> Lists -> Tasks -> Subtasks.
- Tasks are given Statuses (The default ones are “To Do” and “Complete”; I also use “In Progress”) and can be sorted accordingly within their respective lists, folders, etc.
- You can add seemingly endless customizations and filters to narrow or broaden your focus however you want or need to.
That last point is what made using ClickUp a game-changer for me. Customizing and filtering according to my own system makes it feel as though the app itself is tailored to my specific needs.
Game Changer #1: Custom Fields + Views
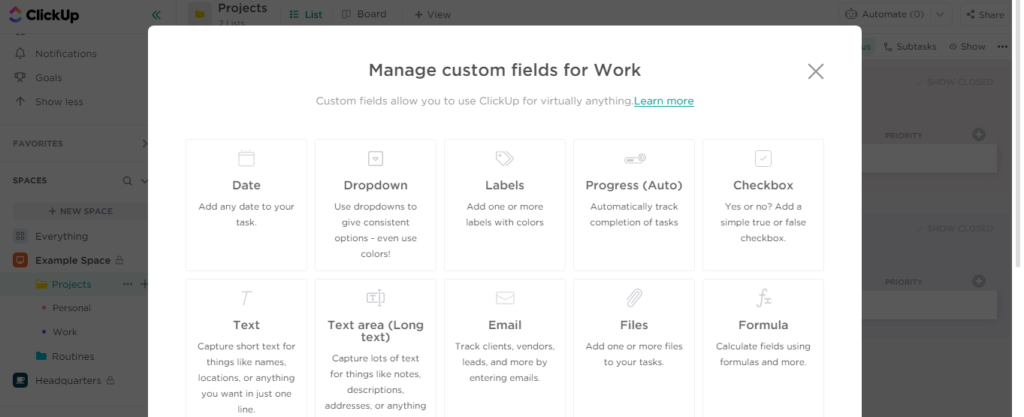
When I first started out using ClickUp, I tried customizing the statuses to create groups of tasks. But that was complex and time-consuming, especially as I had to create different status settings for each list/folder/etc. Then I learned about custom fields.
Custom fields allow you to organize your tasks and lists according to whatever criteria you want or need. For example, in my Client Work folder, I can organize by client name, or type of project, or whatever.
Some of my favorite custom fields are progress bars, dropdown labels, and dates. I also sometimes use a checkbox with a filter designed to hide tasks that have been checked off. This works great for tasks that are complete, but that I still need to reference until other action has been taken on them.
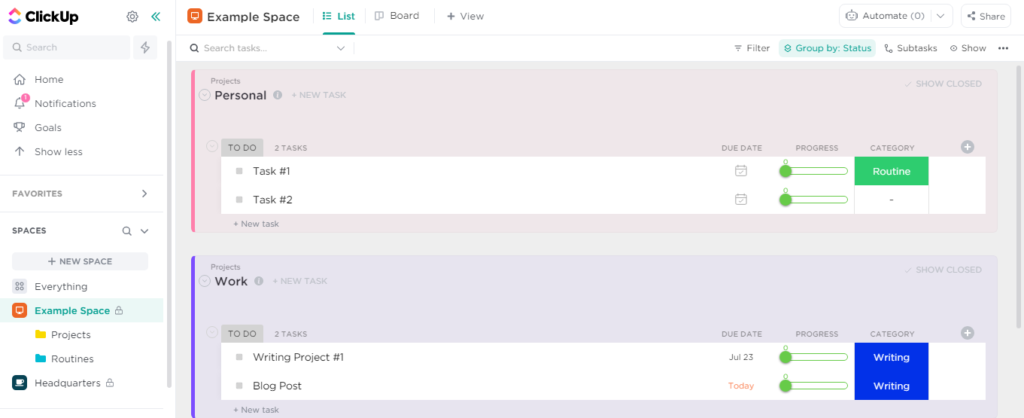
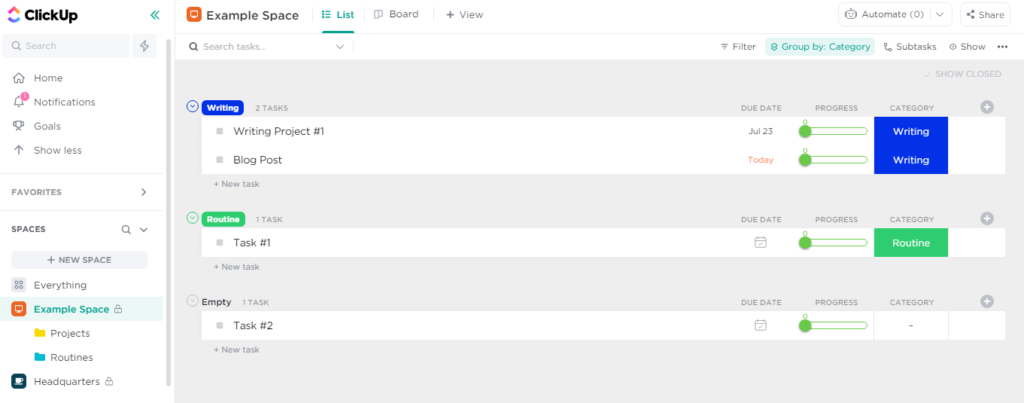
Views are page layouts that allow you to see the data listed in whatever format you need. Options include list (as shown above), kanban board, calendar, table, and many more. You can also set filters for specific views and save them as the default.
I tend to use the list and calendar views most often, but I sometimes refer to others for a different perspective.
Game Changer #2: Calendar Blocking (Without Google Calendar)
Time blocking was my biggest challenge as I was reevaluating my organizational systems. I’ve done it in my bullet journal in the past, but a written schedule is hard to adjust as you go. I didn’t want to go the Google Calendar route, though, because I didn’t want to have to flip back and forth between several different apps or websites.
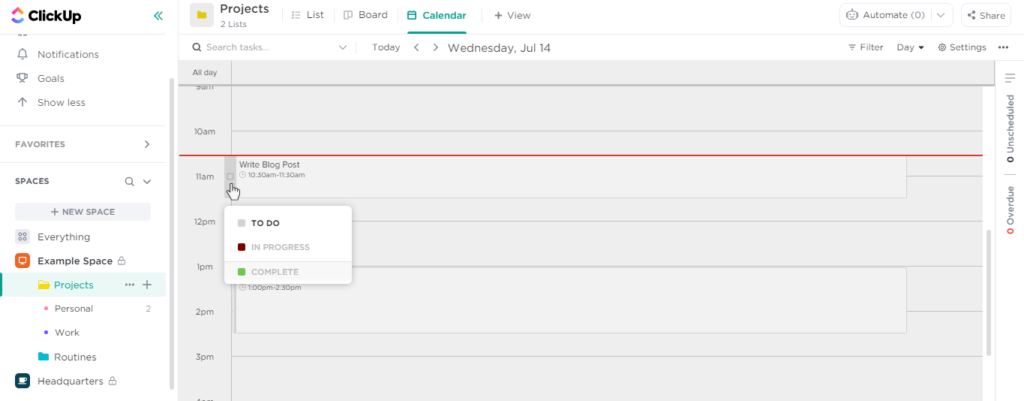
Enter the ClickUp calendar view. It took me a little while to figure out the best system for this, but now it’s the view I use most often.
In the daily calendar view, you can drag and drop tasks into specific time slots. From there, it’s easy to open each task as it comes up, track the time spent, and check off the task as it’s completed, at which point it will disappear (because I have completed tasks hidden on this view).
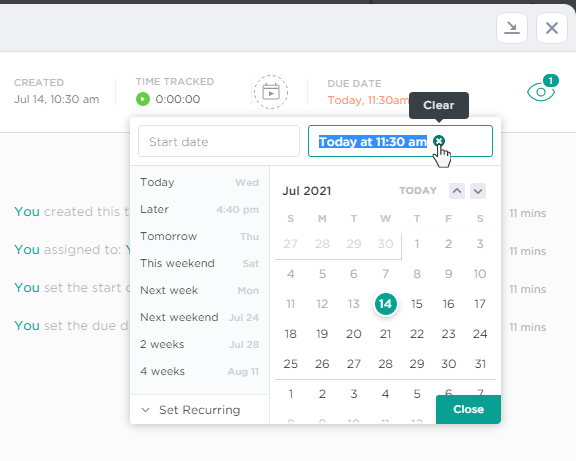
The trick here is to know how due dates work. If a task is going to show up on that day’s calendar view, the due date has to be set to that date — and that time. I’ve found it easiest to note the actual due date in a custom field or the task’s title, and use the “due date” field for time blocking purposes.
Sometimes I have a task that I’m working on for several days. I don’t want to lose the project checklist or tracked time by marking it complete and creating a new task every day. But I do want the satisfaction of an empty to-do list (or calendar) at the end of the day. So for tasks that carry over to other days, I will simply change the due date instead of marking them complete.
Game Changer #3: Legacy Recurring Tasks
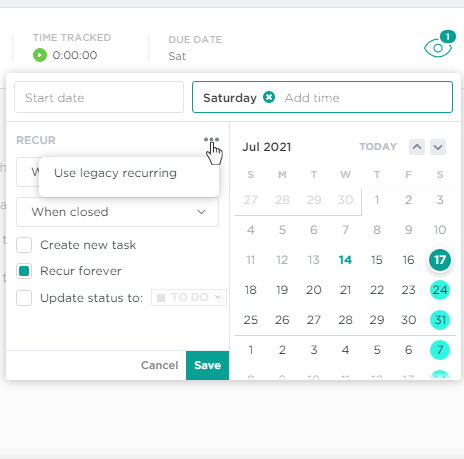
This is where automation comes in. Legacy recurring tasks generate automatically at a frequency of your choice. No more manually copy-pasting templates — these tasks show up on the day I need them, and I only have to set them up once.
Here are some tips I’ve learned along the way:
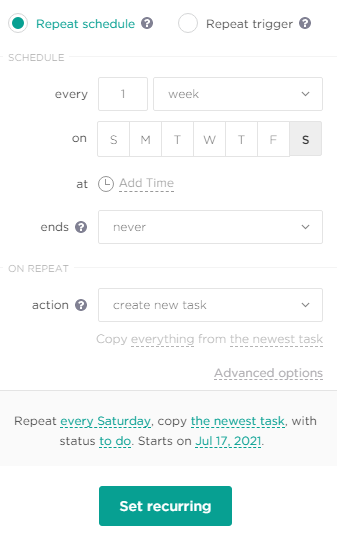
- If you plan to time block at the beginning of the day, set the recurring task to occur at the beginning of the day. If you set it to occur at the time of day you intend to complete it, it won’t create the task until that time.
- For tasks with checklists: setting the automation to “create new task” works better than “change due date.” If it only changes the due date, you’ll have to go back and manually un-check all the checklist boxes every time.
- I like to have it copy the most recent task instead of the original. If you do this, remember that deleting an item from today’s task will also delete that item from future tasks.
- I set the new task to recur at the next due date, and not on completion. If it’s set to recur on completion, the new task will instantly generate as soon as the current task is marked complete. To me, this felt like I hadn’t completed the task at all, since it popped right back up again.
Legacy recurring is the main automation I use, but I do have a few others set. For example, when I assign a specific category to a task, ClickUp will add a designated checklist from a template. (Note that some of these automations are paid features.)
The Right System Makes All the Difference
Of course, using ClickUp isn’t the solution for everyone. No one system or app is. But, like a bullet journal, it does offer a ton of flexibility and customization to fit a wide variety of organizational needs.
If you’d like more tips and resources for finding the right organizational system for you, consider joining my newsletter. You’ll get weekly tips and/or creative exercises, delivered right to your inbox. And you’ll also get access to my exclusive free resource library. Sign up below!
Did you know?
I offer writing & editing, podcast production, and virtual admin services.
Click here to see how I can help you get more time back in your day!